Wow! So much crazy good news. Gen Con! Heroes! Fleets & Fortresses! Colony Wars! All this and much much more on this episode of Megahaulin’!
Podcast Episode 53: Gen Con Cometh!
Leave a reply
Wow! So much crazy good news. Gen Con! Heroes! Fleets & Fortresses! Colony Wars! All this and much much more on this episode of Megahaulin’!
Written by Brad Elkey aka PanicFire
With the Legends Series approaching there is a lot of interest in learning and playing 1B since the tournament will be run in that format. Whenever playing a competitive game it’s important to always be aware of the format you are in and how that affects the gameplay and the decisions you make. Let’s take a deeper look at 1B to understand what is different about this format if you don’t play with these two expansions regularly. If you want to do well in the tournament you will need to study and play in the format quite a bit, otherwise some of the tried and true strategies you’re used to may be lost in translation.
1B is the base set (Vanilla – 80 cards in the trade row), the Year 1 promos (15 cards), plus the Bases and Battleships expansion from the Crisis decks (12 cards) – 107 cards total, 27 of which (25%) are not in the base set. The base set contains 25 bases, Y1 has 6 bases (all of which have an effect only when bases are played), and B adds 4 bases. Additionally, if we look at base support ships the base set has 2 (Embassy Yacht), Y1 adds 2 (Battle Barge), B adds 3 (2 Defense Bots, 1 Mega Mech). 1B increases the number of bases from Vanilla by 10 (40%) and the total number of bases plus base support ships increases by 15 (45%). This makes the role of bases in the game more important than in Vanilla. There are also several big ships such as the Ark, Megahauler, Obliterator, and Mega Mech which tip the balance of play and can often decide the game early if one opponent gets to the bomb and the other hasn’t developed a contingency plan. First let’s look at bases and base support ships, then we’ll check out the bombs.
Bases can be seen as a secret fifth faction because bases go great with other bases. The more bases you have in play the less likely it is that your opponent has enough combat to take them out which means you are more likely to remain with more bases in play. This strategy is known as the base wall. Eventually you accumulate more bases than your opponent can counter with combat and they start to pile up. If you look at any base next to a ship of a similar cost you’ll see it’s initial effect is usually a lot smaller than a ship, but where bases really shine is their staying power. They effectively add to your authority level by making an opponent spend combat on them instead of you (unless they have automatic base destruction which is amazingly strong in 1B), they can get their effect for a few rounds in a row, and bases can also speed up your deck by staying out in play rather than going into your discard if they survive. This is especially true of non-outpost bases which often have higher health than outposts and force your opponent to make hard choices if they want to kill it or let it stay out.
A base strategy is usually a pretty safe bet to go into but be on the lookout if your opponent is going aggro and trying to rush you with combat – especially if they can auto-kill your bases! Remember, bases are not as good as ships initially and they need time to build up their value by staying in play which is much easier once you have more bases, so this is a slow strategy vulnerable to rushes. If you see your opponent start grabbing bases and/or base support ships recognize that they are probably looking for this strategy and shut it down by getting aggressive combat (especially base removal) or by getting your own bases and base support ships before they can buy them. When purchasing bases, you are thinking about a few different factors: cost, the hit points or “butt” of the base (the higher it is the more likely it will stay in play), it’s faction if you have cards with good faction abilities or there are some on the trade row, and its usefulness in the current game state. Much like ships, bases which give you a boost in economy are usually useful early but weaker late game whereas the role of combat is reversed. This is of course a generalization and there are many exceptions. If you’ve committed to the base wall strategy don’t be afraid to take a base that isn’t all that great either since there is safety in numbers when it comes to bases. Your opponent might leave it in play longer so it has more of an effect or it might soak the hit to save a better base. Having a lot of other bases in your deck makes weaker bases more powerful.
The bases from the Y1 Promos are interesting since they only have an effect when they or another base enter play. These bases are only useful while in play if you have another base or a good faction ability for a card of the same color. To get full use of these bases make sure you follow up with purchasing more bases or at least ships which faction off of them. Before taking out your opponent’s Y1 bases check to see if they have any other bases coming up or any really good faction abilities; if not, leave them in play and they have no effect. I call these nerfed bases since your opponent took away their power by not following up with other bases. One strategy is to leave them in play until right after they shuffle before destroying them so it takes longer for them to come back out, but if they have other bases coming up you need to make sure you have the combat to destroy the base before then. Also be wary if they have any base support ships to see if they have any interaction there. These cards get stronger and stronger the more bases you have in your deck. Particularly nasty are the Breeding Site and Star Market which give 5 damage or 5 health every time a base is played – try not to let your opponent get both of these! Starbase Omega is pretty weak on its own but it shines in a deck loaded with bases where you might get an extra card play every turn as well as triggering Star Empire faction abilities (watch out for Yellow in 1B, they win the award for most improved faction!). All three of those bases have high health and are annoying to try to take out. For more info on whether or not to leave bases in play listen to Megahaulin episode 31: Bypass the Base, Go Straight for the Face!
The base support ships in the game (Embassy Yacht, Battle Barge, Defense Bot, Mega Mech, and to a lesser extent the Construction Hauler) can be good on their own but really shine when combined with bases. Be very careful leaving your opponent two bases out if they have an Embassy Yacht, Battle Barge, or Defense Bot, or even a single good base if they have the Mega Mech. Battle Barge and Mega Mech can both return bases into hand which is usually more powerful if done on your own bases to get the effect twice (make sure you activate the effect and/or faction it off before returning it!). Mega Mech is particularly brutal since it doesn’t require you to have two bases in play so it’s like a more reliable Battle Barge. If you are not playing a base this turn but you are returning an existing one and you have a regular base and a Y1 promo base in play make sure you return the regular one after doing its effect – you’ll still get the effect of the Y1 Promo base for having played the regular base this turn. You can return an opponent’s base into their hand to sneak a little extra combat through but be very careful doing this, especially if they have any Y1 bases in play which will trigger when they play that base. Remember for all cards returning a base is optional. Always think carefully before doing it. If there are a lot of base support ships on the trade row make sure you are buying bases with them and not just chasing those ships hoping that bases will come as well, especially if your opponent is buying all of the bases. I’ve seen a lot of opponents build a base strategy with those ships but fail to realize that I’m buying the actual bases before they can.
As important as base support ships is base destruction. Missile Mech is extremely strong since it can do it every time unaided, but Blob Destroyer, Battle Cruiser, Port of Call, Command Ship, and the Ark can all do it either by factioning or scrapping the card. The Obliterator doesn’t kill bases for free but gives an extra combat boost if your opponent has two or more bases which is a nice offset for what is usually a bad situation for you. If you are starting to build a base wall and your opponent gets base removal be careful before continuing. It’s only useful to continue if you have a lot of bases to soak a free removal, but then again leaving them a lot of free bases is dangerous too. A general rule for any game of Star Realms is to always have enough combat to kill your opponent’s bases, and this is especially true in 1B with all of the extra bases and base support. If your opponent is building a base wall you need to be able to knock it down one brick at a time before it overwhelms you, and base destruction is the most efficient way to do this. There’s nothing quite like taking out a nasty 7 strength base for free, and it lets you use your remaining combat on the other bases or directly to them. Remember, every single strategy has one thing in common – you need to get combat to reduce your opponent’s authority to zero, so don’t go chasing after too much economy and let your opponent’s bases pile up. Counter their bases with combat and base destruction and/or a base wall of your own. You can even do a hybrid strategy and hurl big bombs at your opponent while hiding behind a base wall.
In addition to the higher importance of bases 1B also includes several high profile ships, commonly known as “bombs”, to watch out for. These include all of the bombs from the base game, the Megahauler and Ark from Y1 (and Battle Barge with enough bases) and the Obliterator and Mega Mech from B (also Defense Bot if you are really base heavy but don’t count on it otherwise). The addition of more powerful ships increases the return value of purchasing economy early since there are more bombs up for grabs – but be careful since those bombs cut both ways! I have lost a lot of games in 1B chasing after a big bomb like the Ark on the board, overbuilding my economy and either my opponent gets it first or goes aggro and kills me before I get much use out of it. If there’s a single big bomb on the row and you have the trade advantage, go for it; but if there are cheap combat cards don’t be afraid to hammer your opponent while they overbuild their economy going after it. Just remember: race but don’t chase! If you can win the race, go for it. If you think they have a better chance of getting a bomb don’t chase after them and get stuck with all economy cards while they destroy you; go into combat mode early. The Ark is the strongest card in the game but even that needs to get a couple of plays in before being really nasty. If you shorten the game with combat they won’t get much use out of whatever they purchase. The big bombs are often needed to get through your opponent’s bases so try to get them if you can or get more bases to soak the damage if your opponent gets to them first.
With the addition of so many bases and big ships, the pace of 1B can be much faster or slower than in Vanilla. The game is much faster if neither opponent goes base heavy since there are more ships that hit hard, and it will go very fast if one player does not have enough combat to kill the other’s bases. Bases that stay in play do not slow down your deck and can quickly add up damage which will kill your opponent, making for a faster game. If one opponent buys enough combat to kill the other’s bases, or if two opposing base walls are being built, the game is much slower than Vanilla. The pace of the game is very important when considering scrap, as Scott Heise aka Homer Jr. detailed in his Pace of the Game series and Betcha Can’t Scrap Just One article. The longer a game goes the more cards you will scrap out and the more useful purchasing scrap cards early (or even in the midgame if you see it’s going really long) will be. A game without many bases and with big bombs on the row is not a good time to invest in scrap since it will be too short to pay off, whereas scrapping cards while hiding behind a base wall is an excellent strategy since you’ll get several plays out of them and therefore make your bases and bombs come together quicker and more reliably. Just remember if you have a scrap advantage your opponent can catch up very quickly by getting the Ark or Brain World so don’t think you have the game in the bag, and there are more regular scrap cards up for grabs so it’s harder to get a monopoly on scrap like in Vanilla. If an opponent gets a significant scrap advantage, loading up on combat to take them out early is the best bet, but if the trade row doesn’t cooperate hiding behind a base wall and waiting for your lesser amount of scrap to catch up isn’t nearly as good but it’s better than nothing.
In conclusion, 1B can be a very schizophrenic game. The key is recognizing if it is going to be a fast-paced slugfest of big bombs or a slow-grinding defensive base wall game. Sometimes it’s an entertaining mix of the two and an unstoppable bomb deck will hit an immovable base wall. The key to 1B as opposed to other formats is to keep an eye on the bases/base support ships and the big bombs on the board and to recognize how the pace of the game changes with these different cards. The timing of a game changes so much based on these cards that knowing when to transition into midgame and endgame based on the different types of games played in 1B is a crucial skill that is only honed through playing in that format often. As with any other format, keep your options open and switch your strategies to fit what your deck is turning into, counter what your opponent is doing, and react to the changing traderow and game state. In 1B in particular though, recognize the role that bases and bombs play and always factor those into your decision-making process.
See you in the Legends Series.
This week Dustin and Matt discuss the newly announced STAR REALMS: UNITED set. We also welcome long time community member DUSTO! It’s a great time so listen in!

This week Dustin and Matt discuss their most overrated and underrated cards for the Type 1B format. It’s gonna get hot in here!

Dustin and Matt celebrate the 50th episode of Megahaulin and waste no time getting down to business an how you can train to win the Legends Tournaments!

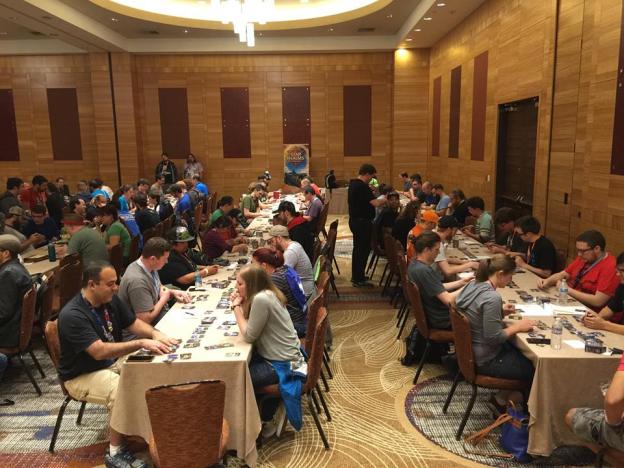
Helsinki, Finland, will be hosting the European location for the 2016 Star Realms Legend series. This premier tournament will take place on Saturday, July 30th at the Ropecon convention in downtown Helsinki. The event will be professionally run and judged by a top 20 player.
Andrea Joki has volunteered to be your friendly INFO person – please feel free to email with any questions about the event or if you would like advice about travel options, hostels, hotels, etc. andrea.joki@gmail.com

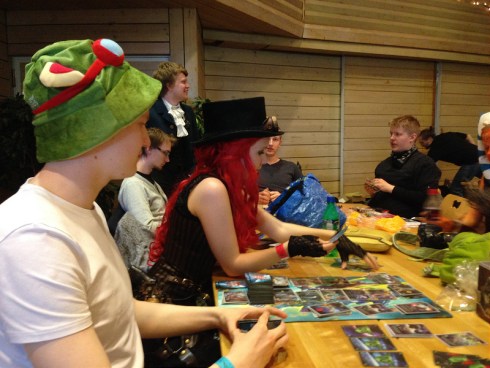
A young Star Realms player sets up a base wall at Ropecon 2015
About the convention: Ropecon, the largest non-commercial role-playing convention in Europe, takes place from 29th to 31st of July 2016 in Helsinki, Finland. Attendance is around 3000 to 4000 people of all ages. The convention is geared toward game enthusiasts: tabletop and role-playing games, as well as in card games, miniatures and board games. In addition to role-playing and gaming centered programs, Ropecon also includes a plethora of lectures and workshops with a wide variety of interesting topics. It is a friendly environment and most players are happy to switch to English to accommodate non-Finnish speakers. It’s also a place where you can join in games with others just by asking – and there is a large board game ‘library’ from which you can check out games for free (100+ games). There will also be an Epic tournament on the same day. The convention runs all night through the weekend. Ropecon;s website in English: https://2016.ropecon.fi/en/frontpage-ropecon-2016/ Note that the program usually comes out about 2 weeks before the event.

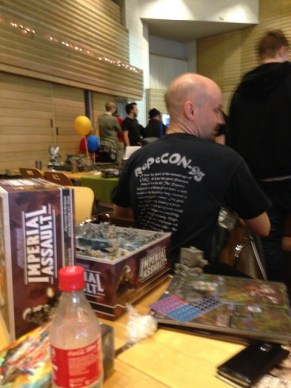
A variety of games are played throughout the weekend. Included are card tournaments for Epic and Star Realms. Here, playing at Ropecon 2015
Getting To the Location: Ropecon will take place at Finland’s largest convention center: Messukeskus. It is located off a large transportation hub and accessible from the airport or ferry harbor for 2 to 5 euros via local train (20 minutes from airport) or bus/tram from the harbor (around 20 minutes as well). Helsinki is a relatively small city that is very easy to get around – public transportation is efficient and timely and the city regularly voted one of the safest in the world. In English, you can get a detailed route plan here: https://www.hsl.fi/en
Star Realms play at Ropecon 2015
Ticket Info: You can buy online (with an EU bank transfer) or at the door. The convention entry fee covers all costs as there are no separate event tickets needed. There are plenty of food options at the convention center as well – from fast food to sit down.
Entire weekend: 35 euros (32e when bought in advance)
One day: 25 euros (15 for Sunday). Children (age 7-12) pay roughly half the price when entering with their parent(s). Younger kids and elderly (over 65 years) have free entry. The cheaper tickets are only available from the door. https://2016.ropecon.fi/en/ticket-faq/

Star Realms and Steampunk: Ropecon 2015
About The Tournament: The Star Realms tournament will be run on Saturday afternoon. The Epic tournament will be run that Saturday morning. Players will have an opportunity to play in both tournaments as a result. Head judge and organizer is Timo Sand.
Star Realms Legend Series Prizes for each tournament:
| Place | Prize |
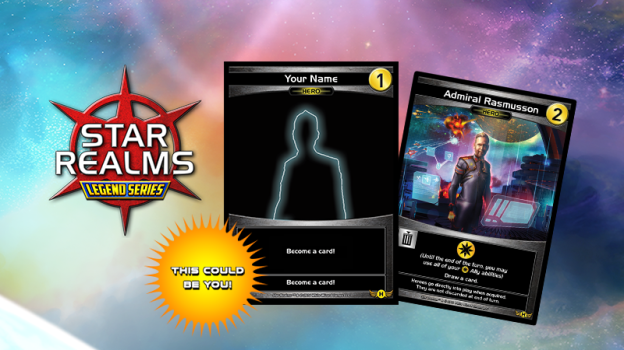
| 1st | Winner will have their name and likeness on a Star Realms card in a future set and a limited edition Star Realms playmat. |
| 2nd | Star Realms limited edition storage box. |
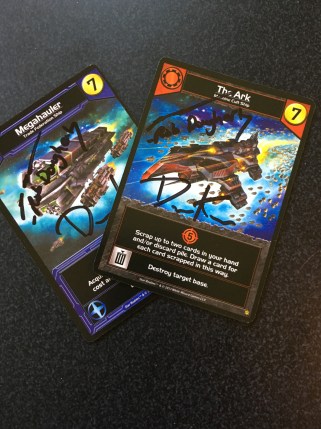
| Top 4 | Signed Megahauler and Ark. |
| Top 8 | Prize promo card. |
| Everyone | A participation promo card for in-person events. |
If you have any questions about the tournament, lodging, getting tickets, or sightseeing opportunities in Finland/Helsinki, send me an email to: Andrea.joki@gmail.com
Ropecon has a 25+ year history of fun games with great people!
Links:
TO BRING YOU THIS EPIC LEVEL INFO!
This week, Dustin and Matt are joined by White Wizards CEO Rob Dougherty who gives the lowdown on the FUTURE of Star Realms! What are you waiting for???
By Andrea Joki/Talvi
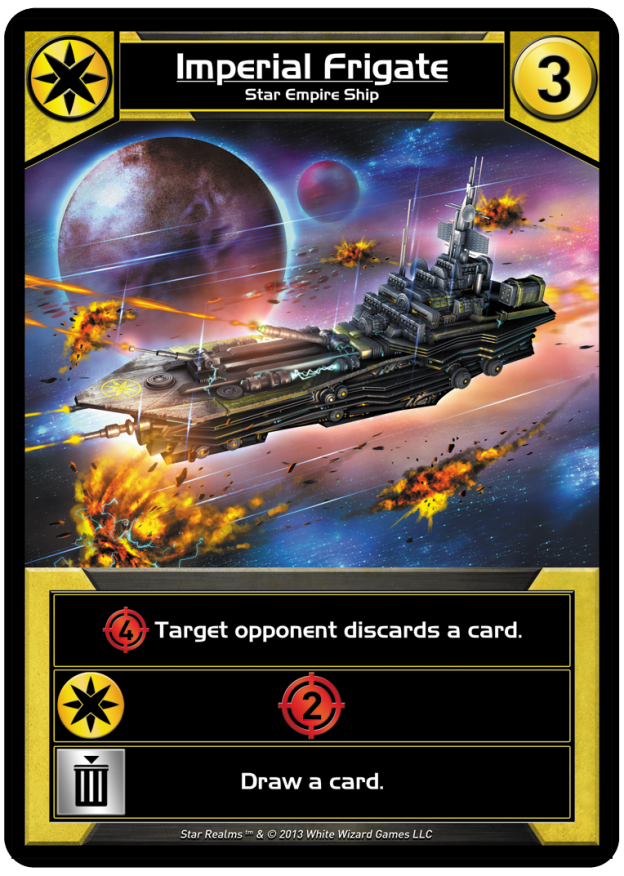
Often in Star Realms, you feel like the game was decided within the first few turns when your opponent gobbled up all the good cards. Early Brain World? Three Imperial Fighters? Four scrappers in a row? A Blob Armada ready to rain down on you? Insane blue authority gain? It can feel hopeless.
What’s important to realize is that the game does have a balance and there are countermeasures to an opponent with a strong set of draws from the trade row. Granted, luck may have to be involved (either for you to have it or your opponent to not have it), but most decks that are strong in one way do have inherent weaknesses you can exploit. Here are some common opponent-advantage situations, their decks’ strengths and weaknesses, and how you can try to avoid what feels like an inevitable defeat.
Let’s start with decks and then move on to powerful single bomb cards that need to be countered.
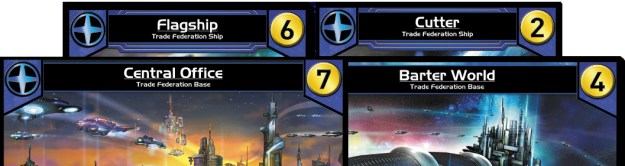
These are the decks that are daunting and morale killers because the opponent gains massive amounts of authority continually and can pretty much cherry pick whatever they want off the trade row with their gold superiority. In choosing how to spend all that gold, they often will either go aggro with big damage ships (risky) or shore up a nifty wall of utility bases that completely shut you down (smarter). This is often a deck with a lot of Cutters, interspersed with Federation Shuttles and heavier hitters such as Flagship or Trade Escort.
Strength: Lots of authority. Lots of gold.
Weakness: These decks are often slow and can be incredibly slow to get rolling/deal substantial damage.
Strategy: This deck tends to allow the authority gain to make up for the lack of solid damage early in the game. Bigger and bigger ships end up being acquired and useful bases such as Machine Base, Blob World, or Fleet HQ become problematic for you by late mid game. But the star players really are the Cutters – their damage adds up quickly when they ally.
Countermeasure: 1) These types of blue decks often lose to an aggressive scrap deck – so snatching up every single card that scraps is key – even midgame. Despite the authority gain, it is fairly quick and easy to take out a blue deck if you have scrapped out your starters and are doing 20-30 damage a turn. The inherent slow speed of a blue deck gives scrappers much needed time to do their job and create a quick and deadly deck. First – define as soon as possible if the player is aggro (aggressive) or defensive blue. Aggro Blue players tend to buy a Battle Blob over a Machine Base, for example. If aggro, go for base protection early or try to grab some blue yourself to stay alive long enough to scrap out. If they are the base wall striver, then a deck with scrappers and yellow or green support works to keep their utility at a minimum and then have the punch at the end. In nearly every instance I’ve seen, heavy blue decks will lose to an opponent with 3 or more scrap cards. 2) Buying cards like Battle Screecher or Battle Pod are key to removing the 6+ cards out of the trade row and wasting big blue buying power. Smart blue deck players will battle you for those scrappers – but e.g., if they gave up a Missle Bot for a cutter, you have a chance. Just don’t be daunted by an opponent’s authority of 75 – I’ve often seen that authority diminish to 0 within three hands thanks to a zippy red deck.
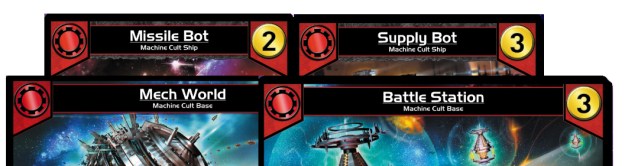
Sometimes, your opponent gets all the great scrap cards (and some bases like Battle Station to shore up defenses while they blissfully remove their starter cards). These decks are fast – with each shuffle, they become more and more powerful, like a ticking time bomb. And that’s the key to countering these decks: don’t give them time.
Strength: Fast – when they get going, they are a steamroller.
Weakness: Red decks can be very vulnerable to early damage. They need at least 3 decks (3 shuffles) before their decks start to gain momentum. Often red decks are gold starved – but a deck with two Supply Bots can have surprising buying power.
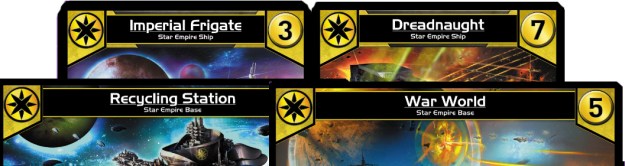
Countermeasure: The one tried-and-true way to defeat a red deck is to simply beat it to death with all the damage you can get early. If you wait to build up to the 6+ cost bases and ships, you’ll likely be too late and by the time one of those gets out, they are hitting you for 15+ damage a turn. Smart red players have at least simple defense outposts or authority gain cards bought later game to keep them alive long enough. So you will not only need to get all the damage you can find, but you’ll also need a way to get to that damage and have it ally better. Speeding up your deck with cantrips (card drawing abilities) is important – but Recycling Station is key. Never let a player with a lot of red cards get a Recycling Station! Yellow and green cards are choice here – don’t even bother with blue in most instances unless it is a card that draws a card automatically (e.g., Flagship) or you can throw it at your opponent through sacking it (as with Barter World’s impressive five damage). Avoid letting your opponent get an outpost or authority gain, if at all possible.
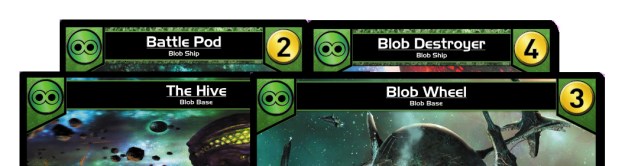
When the Blob army comes marching, they pretty much have a scorched Earth policy. You can try to slow them down with bases and work on scrapping – but the Blob Destroyer effortlessly punches through base walls and they ladder up far too easily (e.g., Ram or Blob Wheel to Battle Blob or Mothership).
Strength: Once these start to ally, it’s all over. More than any other faction, the key to the juggernaut that is a green deck is that they must ally. Rather than bringing extra damage (as with yellow allying), green brings tricks such as card draws, ship acquirement, trade row manipulation, and base removal. They become a card drawing machine with evil combos. As well, their bases, which are out there to ally more than anything else, are non-outposts that soak up a lot of damage if you need to remove them (and you do with a green heavy deck!).
Weakness: If they don’t ally, they can be very weak – especially cards like Blob Fighters. But most importantly: green also provides no outposts to slow down opponent damage (especially noticeable in Vanilla play). So a green deck deals a LOT of damage but they are also extremely vulnerable to damage from you with no way of stopping it in their native color.
Strategy: Really, there are two ways to go here. You can try to match them with yellow damage/discard if you have those options coming up on the trade row. A War World and two Frigates, for example, can be lethal to heavy green. Or you can go heavy blue and gain back authority faster than they can deal it. Surprisingly, a blue deck with outpost bases can last long enough to eventually kill a green deck, even without scrappers. Bases tend to be taken out easily, so utility bases are important – a Barter World is probably always going to be a better choice than Battle Station since you can gain authority if low or buy bases/Flagships etc. Especially since blue has so many card drawing options to match green’s card draw. As well, Blue has a neat trick that green doesn’t: its bases often sack for either damage or card draw. Just don’t let any green base survive to trigger combos – and definitely don’t let a green heavy deck get a Recycling Station (which is used to find more green cards to ally and speeds up the deck fatally!). Hate drafting a Battle Pod can ensure you control how many green cards they get – and cause them to dilute the ability to ally by forcing them to buy more support non-green cards.
This is perhaps the hardest to counter – yellow decks provide heavy damage, sure, but they have extreme utility at the end game through countless sacrifice/draw card options. So while they shut you down through discard, they get to keep their options open.
Strengths: Obviously, the discard/opponent control is important. But really, the great strength of yellow is that so many can be multipurpose in the end game: damage, discard, AND then to sack and draw into more damage/end the game earlier/definitively. Yellow decks can be classified as stealthy – their potential can’t really be gauged until near the end when they start scrapping for draws. As such, yellow is the ultimate utility color, even more so than green. More importantly, unlike green, the potential for sick damage comes up when yellow starts combo-ing – especially with key players like War World. And unlike other colors, you can start yellow but if you have to change colors, you can scrap so many yellow cards like Space Station, Frigates, even Battlecruiser and then invest in a different color (e.g., go blue if you are losing the damage battle). Truly, the ultimate utility color.
Weakness: Yellow has some fatal holes that have to be shored up. Obviously, the lack of gold bearing cards in Vanilla means that yellow can run into econ problems. As well, there is a big hole in the damage: Corvette and Survey Ship can’t hold a candle to their green counterparts Battle Pod and Ram. Nearly every green does damage at the 4 and under cost cards – yellow only has two real damage dealers there. The card draw ability of Corvette and Survey Ship keep the deck lean and mean – but can be problematic if not enough Frigates come up in the Trade Row to make up the low damage (or if War World isn’t available).
Strategy: One of the hardest to counter since your resources are constantly stolen away through forced discards. Going blue is one strategy to counter the constant damage – it has so much gold and authority availability that it can make up for the discards. As well, blue’s buying power is a way to control the trade row, essentially buying away protection bases to leave them open to damage. Often, yellow decks simply peter out – doing massive amounts of damage early but as the deck got bigger, the cards no longer ally as easily, and the damage less deadly. Too many yellow decks stall completely. As well, yellow decks can be a challenge to red discard – you’re going to be very dead before you scrap fully if you aren’t careful. Yellow is fairly terrible at base removal (Battlecruiser notwithstanding), so bases make a better strategy for protection than against a green deck. Just don’t let them get a Recycling Station! And watch for savvy players who stick a Fleet HQ behind cheap 5 outposts – they live forever.

Your ability to come back after an early Brain World buy by your opponent often depends on two factors: how they bought it and if they bottom deck it (i.e., luck). It’s hard to win in this situation – make no mistake. But it is possible. If the Brain World was bought in Vanilla, typically the opponent has a slow deck and used up resources to do it (either having slow cards like Freighter/Trade Pod or sacrificing a Blob Wheel or Space Station). It means they have a slow start on the way to creating a very fast beck. Your choices are limited pretty much – kill them as fast as possible through yellow/green damage cards is the best option most times. Probably best not to bother with blue or red unless you get an opportunity to draw cards – they will be too slow and you need massive damage fast. If, on the other hand, they got that Brain World through Events/Gambits combos, they didn’t have to expend resources too much and only sheer luck of them bottom decking it while you gobble up anything that hits hards can probably save you. Recycling Station is the only non damage card that works against an early Brain World – though you can get bases that you can throw at the opponent like Barter World or Battle Station. Base removal with greens like Blob Destroyer work well. But for blue/red base removal cards (Missile Mech, Port O Call), you probably don’t want to count on them since they will dilute your deck’s damage dealing ability (investing in red won’t help – stay green/yellow).

This one is problematic – it’s the damage that it adds that really adds up fast. So while you are happily damaging your opponent, chances are you’ll be wide open at the same time. It’s just pure luck that they bottom deck it that will save you, unfortunately. And that’s the countermeasure – can you outdamage them or can you keep them from getting any further damage cards on the trade row.

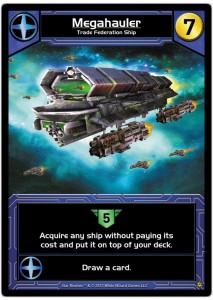
The Megahauler is a machine with a fatal flaw – if there are no good ships out there, it’s a very expensive Fed Shuttle with automatic authority gain. Fortunately, there are Blobs and trade row control to tame the Megahauling beast! Green has the unique ability to preemptively scrap juicy big ship bombs awayt while at the same time providing punishing damage to counter the authority gain. Cards like Battle Pod and Screecher (as well as a Blob Destroyer when allied) efficiently clean out the trade row of threats – leaving an opponent’s Megahauler unusable bases or chump ships for the taking. Another strategy is to have a lot of blue of your own (e.g., Freighter) so you can control the trade row by buying out the good cards first – leaving poorer cards for their Megahauler.

While these may look scary at the beginning, following good deck strategies (scrap, balancing defense and offense) is your best bet. Clearly, the Command Ship is the most problematic and you’ll want to go in very aggressive in damage to counteract its draw/authority gain. The other bombs are mostly damage oriented and those need to be countered with bases to slow down the authority loss or matching with authority gain.
Pretty much, you’ll have to go aggro, especially green. The longer those bases stay up, the less chance you have to come back. Start earlier rather than later, as well, or you’ll be caught flatfooted. So if your opponent gets a Space Station and there’s a Blob World in the trade row, abandon scrap and Authority and start investing in damage/base removal (especially green!). Even buying a Barter World to throw at the base can make a huge difference in how long it lives. It’s rare I’ve ever seen anyone go red and scrap enough to survive an opponent’s early Blob World.

So, although some decks are going to take you out no matter what, and you need some luck on your side (especially with what the Trade Row throws you) or against your opponent, you can at least make them work for it and earn some respect/props for it. Also important is to take note of those weaknesses if you end up with one of those killer decks; too often I see opponents with strong decks who make poor late game decisions that allow other players to exploit the weaknesses. But the key is flexibility – don’t turn a blind eye to how your opponent’s deck is developing: what they are doing currently and in future turns.

This week Dustin and Matt talk about all things news in Star Realms. For strategy, discussion focuses on top tips for Colony Wars and “Big Deck” mode!

by: A. Joki/Talvi
As most learn fairly early, Star Realms is a game with deceptive depths. Over time, players often find themselves stuck on a plateau: unable to move forward and sometimes even backsliding. Typically, plateaus happen at similar points (around levels 6, 12, 17, 22) and come with realizations of key techniques or principles. If you are stuck, here are the most common reasons and the levels at which they often occur.
