By FlyingArrow
How big should your Star Realms deck be? In general, smaller decks with powerful cards are better than larger decks. That is why scrapping is a powerful strategy. However, you can also win with no scrapping. In that case, you need a larger deck to dilute the impact of the starter cards. If no scrap cards are available to you, you have to go with a larger deck. That pretty much summarizes the basics of deck size. Small, scrapped, and dense if you can. Larger to dilute the starter cards if you can’t scrap. The question of whether to pursue a large or small deck is largely answered for you based on whether scrap cards are available to you and how early in the game you get them. There are other issues related to deck size that we should consider.
Deck size is certainly not the most important factor to consider when playing Star Realms. Perhaps the most important factor is knowing the relative strengths of the cards at any given time so that you can buy the right cards. You have to take into account the rest of your deck (will it ally with other cards?) and the stage of the game (is it too late for scrap to pay off?). These affect a card’s strength, but if you can evaluate a card’s strength for a given game state and always draft the strongest card you can afford for the given context, you’re in a pretty good position. Less important, but still important, is knowing the pace of the game and paying attention to your opponent’s deck. Strategy articles have been written about these topics.
Deck size is a less important aspect of the game, but in Star Realms it’s often one play that tips a game in your favor or against you. Before addressing deck size strategy, though, let’s define a new concept: spikiness.
Definition: Spiked Deck vs Flat Deck
Sometimes you get a great card in your deck. For example, a Brain World, Dreadnaught, or Ark. The rest of your deck is not that great. If you plot the power level of the cards in your deck, that one card would be a big spike in the graph. Let’s call this a spiked deck.
Sometimes you don’t get any big cards. Instead, you have a bunch of cards that all cost 1-4, with none significantly better than the rest. If you plot the power level of the cards in this deck, it’s relatively even. Let’s call this a flat deck.
Spikiness isn’t a binary property. Often, a deck is somewhere in between flat and spiked. The spikiness of a deck is also a dynamic property. Obviously, all decks start out the same… a flat deck of all starter cards, so every spiked deck started out flat. However, a deck can also change from spiked to flat. For example, you might get two first-turn scrappers. Those are awesome cards in comparison to the rest of your deck. Your deck is spiked right away. After you buy a few more cards and you have scrapped a couple cards, all of a sudden those scrappers are not as big as they were before. First, because the deck overall is more powerful so they no longer stand out, and also because scrappers are less powerful later in the game. The deck might have changed into a flat deck.
Similarly, even without drawing any huge cards, a deck can become more spiked just by moving to a new phase of the game. With a Blob Destroyer and a few small trade cards, the deck is relatively flat early on. The Blob Destroyer is not significantly better than the trade cards early in the game. It’s great to get 6 combat but it’s also great to buy new cards early in the game, so they’re about the same. Later in the game, if combat has been hard to come by and all other combat cards are 1-2 damage cards, and the opponent has out a 6-strength outpost, the Blob Destroyer becomes much more important and the deck is more spiked even without buying any big cards. All of this illustrates that the spikiness of a deck is something that is dynamic and can only be evaluated for a given instant in a game.
Let’s consider a few more examples.
In deck 1, you purchase a Freighter and two Explorers. The Freighter is by far the best card in your deck – you have a spiked deck.
In deck 1 you purchase two Explorers and a Battle Pod. None of these are great cards, especially for the early game. You have a flat deck.
It’s halfway through the game and you have one scrapper, two trade cards, two 3-cost bases, and the Dreadnaught. You have a spiked deck.
It’s halfway through the game and you have scrapped away 3 starters. In addition to your 2 scrappers, you picked up 4 other non-starter cards, but they are all cost 4 or less. You have a flat deck.
It’s near the end game and you have scrapped down to 5 starters. You have 9 non-starter cards ranging in cost from 2 to 6. All but two of them deal at least 2 damage, and four deal 4 or more damage. The two cards of cost 6 are the Flagship and Battle Blob. Your deck is somewhere between flat and spiked.
Your Ideal Deck Size
Whether or not you have a spiked or flat deck affects whether or not you want to bury cards during the reshuffle. When you reshuffle, it is usually the case that some cards are either in your hand or in play, so they do not go into the new deck. These cards miss the shuffle or are buried or are bottom-decked or are lost for a deck. (There are many terms that are used for this idea.) These buried cards are therefore played one less time throughout the course of the game. Obviously, it’s great if you can leave 4 starter cards buried. Scrapping an Imperial Frigate when there are exactly 5 starter cards in the draw pile is a way to force 4 starter cards to be buried. Obviously, it’s bad if your Command Ship is bottom-decked. It’s difficult to prevent that from happening. But there’s a lot more to managing the reshuffle than just hoping and looking for an Imperial Frigate at the end of a deck.
How does a deck’s spikiness relate to burying cards? In short, you want to bury cards for a flat deck and you do not want to bury cards for a spiked deck.
All things being equal, your later decks are generally stronger than your earlier decks. In later decks, more cards have been scrapped and new, more powerful cards have been purchased. Therefore, generally speaking, you are better off playing more decks than fewer decks. This is especially true with tortoise cards (scrapping and trade), where their impact is seen only in future decks. (They are called tortoise cards because they win games that develop slowly.) Generally speaking, bottom-decking cards is a good thing, because the more cards you bottom-deck, the more decks you see over the course of the game. Of course, sometimes you bury your best cards, which is a bad thing. But often, you bury starters, which is a great thing. On average, you bury cards that are average (for your deck). This is a good thing, because you start in on your next deck sooner, and your next deck is generally better than your previous deck was.
More bottom-decking is usually a good thing, but not always. This is where the spikiness of a deck comes in. It’s a very bad thing if your big spike card is buried. If your best card misses the shuffle and that makes your next deck worse than your current deck (even after considering scrapped cards and new purchases), then you most definitely have a spiked deck. In that case, you probably don’t want to bury any cards because you risk burying your best card.
Burying or not burying cards usually takes some advanced planning. At the last minute, a Recycling Station or Imperial Frigate can do wonders. You can choose to draw or not to draw in order to exercise control over how many cards are bottom-decked. In the physical game, you can exercise much more control because all allied-draw abilities are optional. In the app, you can sometimes scrap a card (e.g. Battle Station) to avoid triggering an allied-draw ability (e.g. Missile Mech). But these are just last-minute actions you can take. You can exert more control by planning ahead.
You can tell when you’re going into a reshuffle by looking at your draw pile at the end of your turn. If you have 4 or fewer effective cards in your draw pile, you are going into a reshuffle. When counting “effective cards” in your deck, don’t count cards that provide a free draw. So if you have 5 cards in your draw pile but one is a Corvette, don’t count the Corvette. That makes 4 effective cards, and you are going into a reshuffle. Because only a few cards remain in your draw pile, you can generally tell whether or not ally-draw abilities (e.g. Blob Fighter) will trigger. If they will trigger, don’t include those cards in the “effective card” count.
Counting the effective cards will let you know when a reshuffle is coming, and you can use the same idea to size your deck for your next reshuffle. As you are heading into a reshuffle, count the effective cards in your deck. By counting the cards in your deck, you can largely determine how many cards will be buried in your next reshuffle. When counting effective cards for the deck, bases in play don’t count – they won’t be part of the shuffle. Remember that cards with free draws count as 0 cards. Command Ship counts as -1 cards because it will draw two cards. Ark, Brain World, and Recycling Station generally count as -1 cards as well, even though their draws are optional. Ally-draw abilities are much trickier to handle when counting effective cards for the whole deck (versus counting for just the draw pile) because you don’t know if they will trigger or not. Take your best guess. If you think it will trigger, don’t include the card in the effective card count.
If you have a flat deck, burying cards is good, even if you might end up burying some good cards, because it gets you into your next deck more quickly. So you want your effective deck size to be one less than a multiple of 5 (e.g. 14). That will leave four cards buried when you reach your next reshuffle. Why not bury 3 or 2? There’s nothing wrong with that… you just want to get to your next deck quickly. Whether you burying 2 or 3 or 4, you will still get into your next deck on the same hand. However, at the point where you would buy a card that pushes your effective deck size from 14 to 15, take into consideration that you will start your next deck a hand later. There’s not as much difference between burying 3 cards or 4 cards.
If you have a spiked deck, you want to make sure your best card is not buried, so you want to make your effective deck size a multiple of 5 (e.g. 15). If you go into a shuffle with a multiple of 5, you should draw every card without leaving any buried. If you can’t hit a multiple of 5 exactly, it’s better to bury fewer cards to minimize the chances that your big card is buried. This is the exact opposite of the strategy with a flat deck, but it’s because with a spiked deck your game can be trashed by burying the wrong card. If your deck is somewhere in between spiked and flat, this aspect of the game is probably not that important to you, but more bottom-decking will probably be better than less.
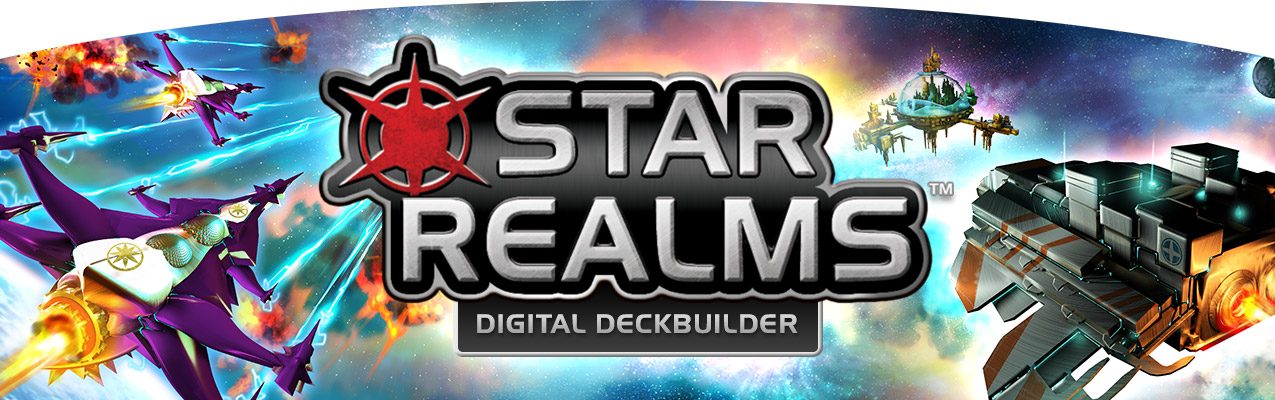
As mentioned, the effective deck size cannot always be computed exactly. There are allied draws where you can’t tell if they will trigger. If a card with a draw is itself on the bottom of the deck, then it will miss the shuffle even if the effective deck size is a multiple of 5. As a side note, this issue makes the Battle Blob a better card. With the Command Ship and Dreadnaught, there’s always a chance of being bottom-decked, even if you size your deck exactly to a multiple of 5. With the Battle Blob, if your deck has no ally-draws you can size the deck to guarantee that the Battle Blob doesn’t miss the shuffle. That doesn’t make the Battle Blob better than the other two, but it’s a small point in its favor.
Sometimes your deck size is only one card away from your desired deck size and a purchase or lack of a purchase on the turn before the shuffle will put you where you want to be. Sometimes you’re multiple cards away from where you want to be, so you need to start planning earlier. Suppose you have a 13-card spiked deck including a Battle Blob. Unless you have 3 scrappers and can get down to 10, you may want to get up to 15 cards (but not 16). That means buying only 2 cards. Assume your draw pile has 7 cards in it. You’ll be reshuffling not at the end of this turn but the end of the next turn. In order to make your effective deck size 15, you will purchase only two cards total on this turn and the next. That may mean you decide to buy only 1 card this turn so you can still buy one on the next turn. So you don’t buy an Explorer this turn, or you buy a weaker 4-cost card instead of two stronger 2-cost cards. Again, this is to control the number of buried cards on the shuffle at the end of the next deck.
The size of your deck is irrelevant when you are going into your last deck of the game. It is usually not possible to know for sure when the game will end, but it is important to pay attention to the pace of the game so that you don’t take deck size into consideration after it is irrelevant. Your purchase, draw, and scrap decisions during deck 3 (and especially on the last turn of deck 3) will determine the size of your deck during deck 4. The size of your deck during deck 4 will determine how many cards will be buried and miss the shuffle for deck 5. If the game will end at any point during deck 4, deck 5 never happens so your deck-sizing decisions during deck 3 were irrelevant.
Chaos and Deck Size
Another aspect to deciding whether to bury cards or not is whether you want to inject more chaos into the game. If you’re winning, you don’t need more chaos. Status quo is good. If you’re losing, you need more chaos. When you’re losing, something has to change so that you can change your status to winning. Burying more cards injects more randomness into the game, and gives you a chance to get lucky (such as perhaps burying 4 starters). If you’re losing, bury cards. It increases the randomness. You might kill any chance you have, but it’s a way to roll the dice and possibly get lucky. Similarly, if you’re facing a weaker opponent, you don’t need more chaos. If you’re facing a stronger opponent, you need more chaos. If you’re even, it doesn’t come into play. If you think you are in a losing position, whether it’s based on the current game state or based on the opponent you’re facing, randomness gives you a better chance to get lucky and turn things around. Four buried cards can provide the randomness you’re looking for.
Summary
The following table summarizes spikiness, chaos, and whether to bury cards:
|
Flat Deck |
Average Deck |
Spiked Deck |
| Winning (avoid chaos) |
Doesn’t matter |
Don’t bury |
Don’t bury |
| Even |
Bury |
Doesn’t matter |
Don’t bury |
| Losing (need chaos) |
Bury |
Bury |
Doesn’t matter |
| Hopeless (need chaos) |
Bury |
Bury |
Bury |
Keep in mind that this is less important than many other aspects of the game, such as knowing the relative strengths of the cards, watching the pace of the game, and countering your opponent’s strategy. However, it can be used as a tiebreaker when you’re deciding between two choices that seem about even. On deck 2, should you keep or scrap your Explorer? You’re deciding between taking a cost-5 card that doesn’t ally with your deck versus two cheaper cards that do ally with your deck. Is it time to scrap my Imperial Frigate yet? I have two trade – is it too late to bother buying an Explorer? If you can’t decide, maintaining a deck size that is ideal for your spiked or flat deck may be enough to push you in one direction or the other.