
By Eric Navarro aka erictht
Editor’s Note: This is Part 5 of our Command Deck Strategies Series. We also recommend:
- Part 1 on Fleet Director Nandi
- Part 2 on BioLord Walsh
- Part 3 on Overlord Newburg
- Part 4 on High Admiral Jochum
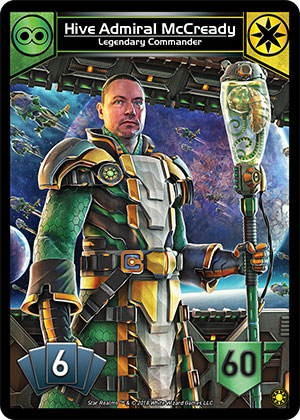
Who Should Play McCready?
If you’re a player who loves going aggro and overwhelming your opponent before they can even get their strategy started, the McCready is the Commander for you. Skill-wise, a player who knows how to sneak in every point of damage possible and loves streamlining their deck is going to thrive with this command build. Plus, if you’re someone like me who loves drawing cards as much as they hate the math involved with scrapping strategies, then good news: The Union is the deck for you.
You need to be a player who can stick to a focused strategy without any distraction, modifying it slightly based on gamestate and match up. If you are a dedicated aggro player, this is your chance to zoom the microscope in on this linear strategy and refine your play until it is as efficient and effective as possible. In summation: burn baby burn.
You start with 60 authority and draw 6 cards per turn (3 if you’re going first). The Union’s starting deck is blisteringly fast, boasting an impressive 16-25 starting damage and few enough deadweight cards that scrapping is not needed. More importantly, the clunkiness of adding a single card that does not fit your strategy will greatly outweigh any scrap benefits later in the game as most games end shockingly quickly. Speaking of which, be prepared to wait a long time between rounds in the in-app tournaments.
With all that said, are you Mc’Ready to play McCready?
…sorry.
The Starting Deck
The Union comes with an 8-cost ship to shuffle into the Market Deck at the outset of the game, two gambits to set aside for use during the game, and a 12-card starting deck. You begin the game with 60 authority, instead of the normal 50, and a hand size of 6 cards, instead of the normal 5. You will start with 3 if you are the first player. Let’s examine each card you bring to the game:
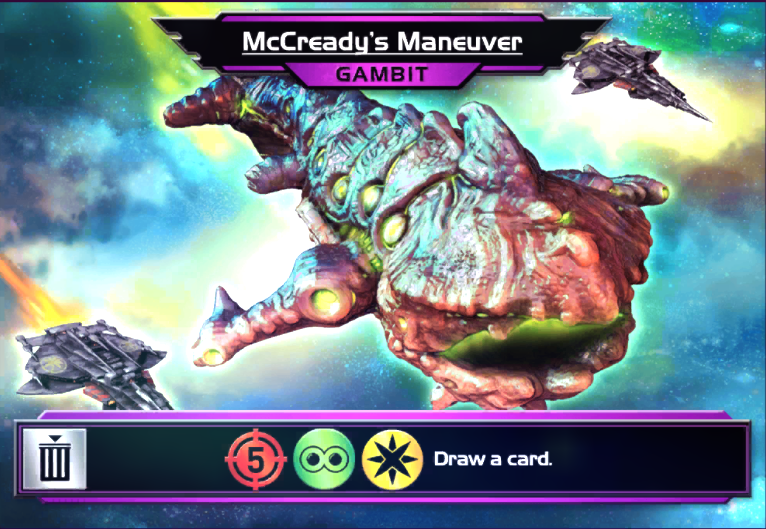
McCready’s Maneuver: Scrapping this card nets you both of your ally abilities, five damage, and the best part, drawing a card. There are several key points to effectively use this gambit, but it can be used at any time to further your strategy.
Here are the primary optimal uses for McCready’s Maneuver:
- When going first, I’ve often found myself one trade shy of grabbing a perfect opening card. I have no qualms about cracking it immediately as the early game is when you need to be most active with picking cards up on the trade row. The Union’s best strength is putting its opponent in such a perilous state very quickly that they have to either abandon their deck’s optimal strategy or simply burn to death before they get anything going. Also, there’s never a bad time to hit your opponent for five damage and likely trigger ally abilities for 1-2 cards in your hand. I find that I use this gambit on the first turn about half of the time when I’m going first. Going second gives this card a much wider range.
- Triggering a reshuffle. Reshuffles are the Union’s best friend. Often you’ll find yourself in a gamestate where your deck is split, with most of one faction in your hand and most of the other faction in your discard pile or deck. In this uncommon (but certainly not rare) situation, triggering a timely reshuffle can essentially split your cards down faction lines so you have a much better chance of hitting your ally abilities over the next few turns. This also applies to all the other opportunities that arise out of a mid-turn shuffle such as getting another card to trigger an ally ability, grabbing the last points of damage to destroy a base or kill your opponent, or simply when you have a hand full of scouts and a discard pile full of gas. Make sure to make trade row buys accordingly. For example, if your hand is full of blob cards and your discard is mostly star empire, pick up the yellow cards prior to your mid-turn shuffle. Or pick up blob cards if it is post-shuffle (though that sounds pretty inefficient, but hey, crazy situations emerge so keep that in mind too).
- Grabbing an extra card to get a much needed trade boost for a critical 5+ drop on the trade row. Seriously, the 5 trade Blob and Star cards that draw are slam dunks that can secure you a victory if you get them early enough.
- Destroying a base: This gambit is best used for offense but in certain instances (particularly against The Unity and The Alliance) you’ll want to wait in case your opponent sticks a first or second turn base that needs to be dealt with immediately. Side note: if you don’t absolutely have to destroy an opponent’s base, then don’t. If it’s not an outpost and it doesn’t do anything to impede your strategy of hitting their life total, then let it stay.
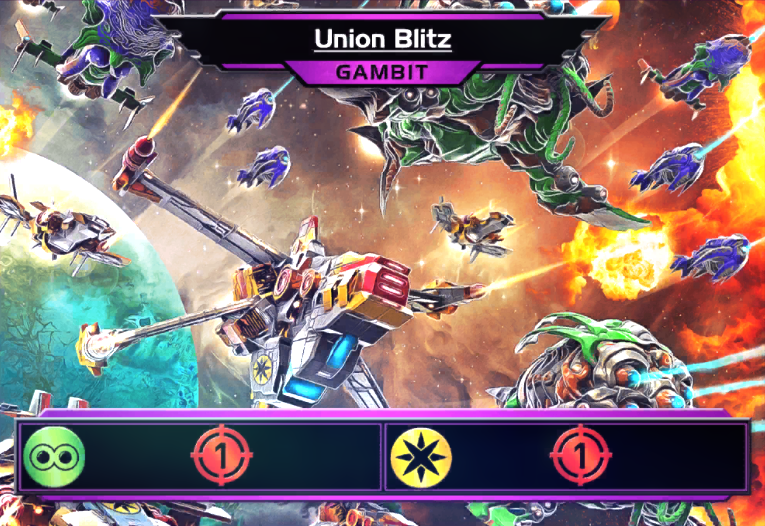
Union Blitz: There’s not much to this one. At its best, this card basically reads: “Each turn add 2 damage.” This is the engine that majorly rewards you for playing pure aggro. You’ll often hit the two damage without trying, but keep this in mind if you have to find yourself in the rare situation where you’re considering snagging off-faction cards.
Meganaut (1x)
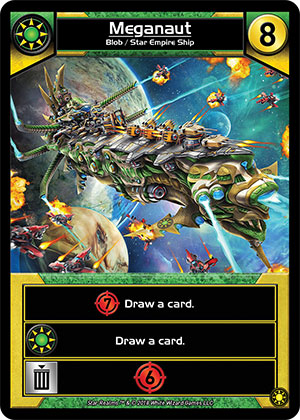
It’s an on-color bomb that does damage and draws. If you can pick it up, sure, go grab it. Just don’t plan your game around getting it.
Tribute Transport (1x)
This is the best non-gambit card in the deck. In the early game it enables you to buy the 4-5 drops that it will later help you draw by discarding unneeded scouts.
Cluster Viper, Imperial Talon, Ripper, Viper: These are pretty straightforward. Play them and they do damage.
Protopod(x1) and Scouts (x4)

These are also very simple. Play them for trade in the early game and (hopefully) discard them to draw/discard effects like Tribute Transport and others from the trade row as the game progresses.
Ranger(1x) and Imperial Scout(1x)
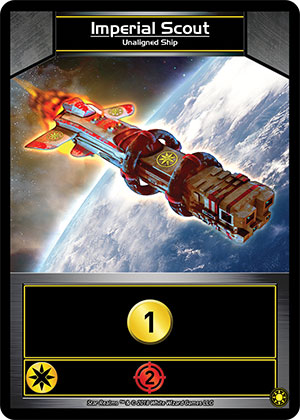
Once again, very basic. If you need their trade to grab something important from the trade row then do it. But if not, sneak in every point of damage possible.
The Plan:
The optimal strategy is going purely aggressive and aiming to take your opponent’s authority total down to zero as quickly as possible. Since the strategy is quite linear, much of the decision-making involved in playing McCready is in your trade row buys. While you will be going straight up aggro for 99% of the games, there is still a lot of wiggle room in how to maximize damage and play around your opponents strategy or match up. Generally speaking, you want to order your trade row pickups as such. Match ups and trade row/game states may alter this order, which will be detailed in the match up section below:
Damage cards that draw or draw/discard
For the remainder of this article, I’ll be using the word “draw” to represent both draw and draw/discard effects. These are your babies. Take them and take care of them. Your starting deck naturally cycles through itself every two turns and you can keep it this way by picking up draw cards that speed up the clock on your opponent. You start with one draw card in your deck and a gambit that does the same. Due to the shortness of the games you will be playing, there will be many games where you’re able to trigger a mid-turn shuffle nearly every few turns. These cards act as your scrappers so it’s important to recognize their value as such.
On-faction damage cards that also produce trade
This is second on the list but it’s a distant second. The deck can set up a 6 trade turn 1-2 times per game pretty easily. On-faction cards that produce 2-3 trade and also further your clock with damage will give you the ability to compete when you see the dreaded “all big cards” trade row that happens from time to time. Some bases fall into this category but primarily you’re going to be taking ships as, once again, the games rarely go long enough that you’ll be able to draw them multiple times, and since it’s commander, every deck has a way of immediately dealing with the first mid-level base you play. That said, don’t be afraid to let your deck play out if you can’t afford anything useful and you’re ahead. The worst thing you can do in a tight game is take excess cards that do not fit your strategy.
Off-faction Damage/authority cards
If the only options on the trade row are off-faction, grab anything that will swing the game’s life totals in your favor. The order of these cards very much depends on the match up and gamestate. If your opponent does not have you on a fast clock, forgo these tempo-based cards for more straight up damage. This includes bases that can be scrapped as you’re not playing them for defense so you do not want to draw them again, especially since they’re off-faction. If the game is more of a race, such as against Newburg and the mirror match, authority/damage based tempo cards are more useful in the later stages of the game.
Other on-faction cards
If all you have available are on-faction cards that only serve to hit your ally abilities, you may or may not want to take them. Small bases or Empire cards that cause discard but little damage (and no draw ability, of course) are often best left on the trade row. However, if it’s early in the game and those are your only options, then go for it. I’ve encountered this situation very few times and my decision tended to come down to what phase of the game I was in. The earlier the game, the more likely you’ll want to pick up these cards. If it’s later in the game, you’re probably best leaving them there. As a general deck building rule, you do not want to put cards in your deck that are weaker than the majority of cards in your deck. With McCready, you’ll have more “good” cards than dead weight after picking up 3-4 cards from the trade row. No need to bloat your deck with crappy cards when it takes so little to streamline this lightning-fast monster.
Important Note
6+ trade off-faction bombs that further your aggressive strategy are not included in this list. If you can grab a ship or base that very clearly helps you win the tempo war by damage or a combination of damage and authority gain, do so. This may be commander, but basic Star Realms strategy still applies so take the good cards when you can. Just make sure to keep your linear aggressive strategy in mind at all times. A 7 trade base that scraps is not nearly as good as a couple of on-faction damage/draw ships. Also, note the game state and match up when deciding on bombs. Taking a Brain World always seems like a slam dunk for the long game but why plan to play the long game if you’re a few damage points away from straight up winning the game?
Match Ups:
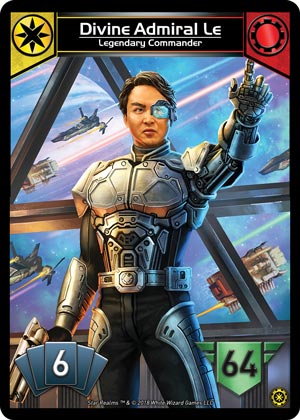
Divine Admiral Le: The Alignment’s strategy is similar to yours, except they are using scrap to eventually draw their entire deck every turn. If they’re a competent player they will be fighting you or every yellow draw card possible. Prioritize Star Empire cards since they will be less inclined to go off-faction to take your greens. Plus, this helps leave dead cards on the trade row for them that you can pick up when the time is right. Their strategy is similar to yours except they use scrap and have a slower clock so you have the matchup advantage. Watch their deck and try to prevent them from amassing a massive combo with yellow cards. Do not get scared by their ability to widdle their deck down so fast as they will still need a few turns to actually do the damage to kill you. Don’t get overwhelmed and panic-buy authority cards and bases.
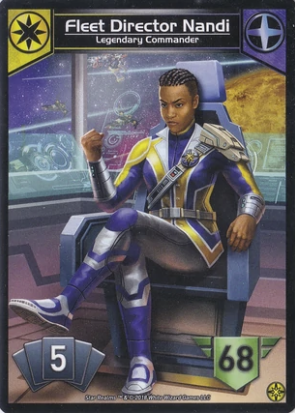
Fleet Director Nandi: Nandi has the ability to buy and play huge bombs very quickly that can put the game out of reach. I call it the, “Oops, I win” factor. Keep this in mind when deciding how to use McCready’s Maneuver as the trade row should let you know exactly what they’re capable of. If they aren’t able to overpower you in the first 3 turns, the matchup swings back in your favor as, even if they can grab a few bombs, they are a slow deck that needs to “combo off” in the late game. Lesser experienced Nandi players may try and go full control on you with bases and authority gain. Ironically, this is probably the better long game strategy against The Union but it’s very easy to maneuver around. Fight them for Star Empire cards, prioritizing discard effects. If you can get them discarding 1-2 cards per turn, you will have a great shot at winning the tempo war.
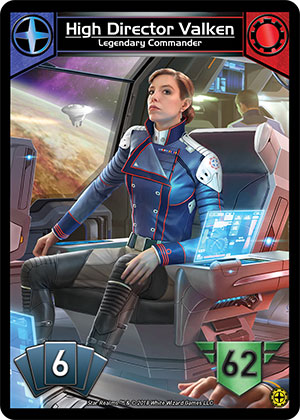
High Director Valken: This matchup is really good for you. If they go with their optimal strategy of scrap and authority control, you will win that race easily since they will leave your trade row options wide open and they are slow. If they hate-draft the cards you want, they run the risk of a series of clunky, slow draws, which favors you even more. Stick to aggro and your regular strategy and you will be favored in this match.
Overlord Newburg: Oh boy. This one’s tough as their strategy is to use tempo to outrace you and their starting deck and trade row options provide a much greater authority differential than yours. To be honest, I’ve won more games in this matchup due to my opponent picking up unnecessary cards from the trade row than I have from the trade row providing my deck with the right cards to win the race. Unfortunately, the long game simply favors them and they are the deck best equipped to live that long against you. Your one advantage in this matchup is your affinity for Star Empire cards. Prioritize cantrips and card draw above all else. The Pact has lots of very useful cards on the trade row but they will never draw their deck or “combo off” the way you can. Play very tightly and you can craft a deck that can draw 10+ cards in a turn, triggering a mass discard turn followed by a killing blow when they pass the turn back. Good luck. This one’s tough.
Admiral McCready: In the mirror match, I’ve seen so many players succumbing to the temptation to buy bases or early authority gain to get an edge. However, due to the short nature of any game with McCready (especially the mirror), the phases of a typical Star Realms game are much shorter and this “edge” only tends to work in the late game. If you are close or behind in the damage race after 3-4 turns, this is the time to snatch a Trade Federation card that can cause a 7+ life differential or an on-faction outpost that also does damage. Prioritize card draw and try to keep your opponent from having more than 2 discard cards in their deck. If you can grab a few yellow or green damage ships that draw a card early, you should pull ahead by the end of your second shuffle and ride that lead to a narrow victory. On the very rare occasion that the trade row forces both of you to abandon an aggressive strategy, pick up an on or off-faction 3+ trade gain card (including bases that scrap for 3+ trade) and resume prioritizing card draw and damage. I’ve seen a few games like this and the winner tends to be whoever snags the first 6+ trade tempo or damage bomb. Lastly, timing an effective mid-turn reshuffle can greatly swing the game in your favor, particularly in this matchup.
Biolord Walsh: Much like Nandi, this deck can “oops, I win” in the early turns due to its powerful base-nabbing gambit. Be more conservative with McCready’s Maneuver if the trade row makes it obvious that they will be sticking a powerful base. Otherwise, this is similar to Nandi in that if you survive the opening few turns, you will have the advantage. However, in this match, you will be fighting over the Blob World cards so prioritize those along the same line as Star Empire cantrips. Leave the yellow cards they can’t use on the trade row until there are no juicer options available. They also have no authority gain and they are not on-faction with the Trade Federation so, once you’ve accounted for an early powerful base, go ahead and, once again, GO AGGRO!
Jochum: I’m far from the first person to point out that Jochum is the best commander deck. However, McCready actually has a solid matchup against the Lost Fleet. If your opponent attempts to play control, you will outrace them. Go with your typical strategy and adjust based on the strategy that shapeshifter of a deck chooses as the game progresses. Unfortunately, if they play Nandi-style combo, in which they exclusively grab bombs and card draw, you are much less likely to win this one in the long game. Prioritize trade row scrap early and fight them on all yellow card draw. Just try to kill them as fast as possible. Like Newburg, this is another matchup where you want to hope they grab superfluous cards from the trade row. If they do, you can punish them with your hyper aggressive strategy.
Final Thoughts and Misc. Tips:
What about games where you cannot go aggro? In the very rare instances in which the trade row simply does not provide anything for your aggressive strategy, prioritize a single card of any faction that produces 3+ trade. A single off-strategy card will absolutely slow you down, but that’s okay if it enables you to get a powerful 6+ trade bomb. Bonus points if it’s a card that also scraps or can scrap itself. Hopefully, games like this should be few and far between.
Any green or yellow card that does damage and draws a card is a complete and utter bomb and should be treated as such.
It is incredibly easy to hit on-faction double ally abilities with this deck.
Your first 3-4 turns require the most thought, time, and attention. Think very thoroughly about your trade row decisions (and your opponent’s as well) in the early game and you will often be rewarded by smooth sailing in the mid and late game.

Pingback: Command Deck Strategies Part 6: The Alignment and Divine Admiral Le | Megahaulin Blog for Star Realm Strategy
Pingback: Command Deck Strategies Part 7: The Coalition and High Director Valken | Megahaulin Blog for Star Realm Strategy