By Rick DeMille aka Darklighter
Editor’s Note: This is Part 4 of our Command Deck Strategies Series. We also recommend:
Introduction
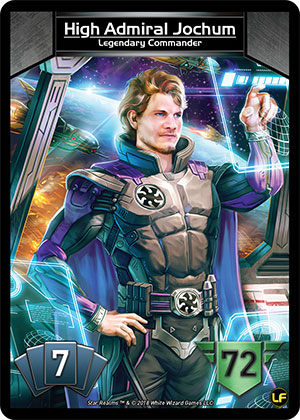
High Admiral Jochum introduces a new card type/game mechanic: Shards. Because of this, Jochum probably has the steepest learning curve – though not the longest – among all Commanders. Hopefully the summaries and insights provided in this article will help shorten your Jochum learning curve, and ultimately assist in your mastery of this great Commander of the Lost Fleet.
- Why Jochum?
- Jochum’s Starting Deck
- General Strategy
- Shard Scrapping: Order of Operations
- Tools for Defeating Jochum
- Matchups
- Conclusion
Why Jochum?
This question has two primary answers:
- Jochum is the Best Commander
- Jochum is Fun to Play
Jochum is the Best Commander. True, that’s only my opinion. But sometimes opinions are true. First and foremost, Jochum has a 7 card hand with built-in scrap and cycling abilities (explained below). In his Nandi article, aldaryn pointed out that the longer a game goes, the more Nandi’s 5 card hand becomes a disadvantage. The reverse is true for Jochum: the longer a game goes, the more insurmountable Jochum’s 7 card hand becomes. Jochum’s 7 card hand also provides significant early game purchasing power. Oh and by the way, Jochum’s starting health (72) is the highest among Commanders.
Early numbers also suggest that Jochum is the best Commander. I tracked Commander vs Commander stats in some Commanders events I recently ran. As of the writing of this article, Jochum had the highest win rate (62.07% in 145 games), which was 9 points above 2nd place (Walsh: 53.62% in 138 games). This is a relatively small sample size so it’s certainly possible these numbers can change.
Jochum is Fun to Play. While some Commanders proscribe a certain approach (McCready-aggro, Walsh-bases, etc.), Jochum is a blank canvas on which you can create your winning deck. Jochum’s starting deck is unique and versatile, due to the Shards. More specifically, Jochum’s starting deck includes a good amount of trade, some damage and life gain, as well as built-in scrap and cycle abilities. This versatility and array of built-in abilities makes playing with Jochum a fun and non-repetitive experience.
Initial Comments on Strategy
The long game favors Jochum due to his 7 card deck, which would suggest a control deck strategy. And indeed, if Jochum has time to build a strong control deck, the game is probably over. But Jochum can win an aggro battle too; the person playing Jochum just needs to realize that’s what’s happening.
With that said, since Jochum’s starting deck introduces a new card type (Shards), I will first give an overview of Jochum’s starting cards/abilities, then dive deeper into strategy.
The Starting Deck
Shards and the Splinter Ability
Jochum starts with a 14 card deck comprised of:
- 3 Transport Shards (cycling)
- 3 Salvage Shards (scrap)
- 3 Recon Shards (life gain)
- 3 Assault Shards (damage)
- 2 Command Shards (wild cards)
- [each Shard’s Splinter ability is shown in parentheses]
11 out of the 14 Shards grant $1 as the primary ability, the exception being 3 Assault Shards which each grant 1 damage. Each Shard also has a Splinter ability.
Splinter Ability. When you play 3 matching Shards on a turn, you then can discard that set of 3 from play to use their Splinter ability. Important Note: The Shards are discarded from play, not from your hand. In other words, you still get the benefit of each card’s primary ability when you discard them from play for their additional Splinter ability.
Transport Shard (3x).
The cycling Splinter ability is typically the most valuable over the course of the entire game. In the early game it’s useful to cycle out Assault Shards for extra trade. In the late game cycling is typically the most helpful of the Splinter abilities, which is why I recommend Transport Shards be the last Shard that you scrap.
Salvage Shard (3x).
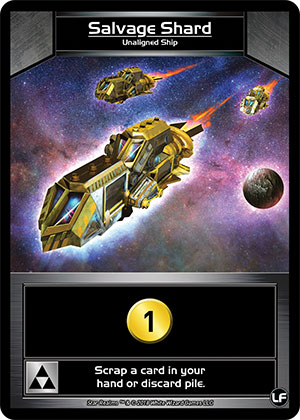
Thinning your deck of starters is still important with Jochum. But the order of scrapping Shards matters, and warrants a separate discussion below.
Reminder: When using a Splinter ability, you first discard the set of 3 cards from play, then use the ability. So you can discard 3 Salvage Shards to use their Splinter ability, and then scrap even one of the Salvage Shards you just discarded.
Recon Shard (3x).
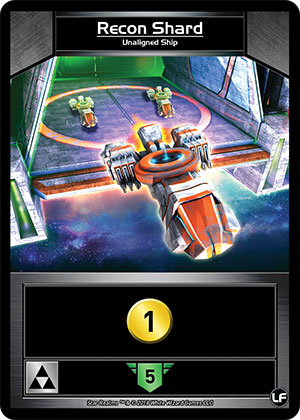
Not much to say. Recon Shard’s Splinter ability is probably the least valuable of all the Shards. But Recon Shard grants trade which is why it often has early game value over the Assault Shard.
Assault Shard (3x).
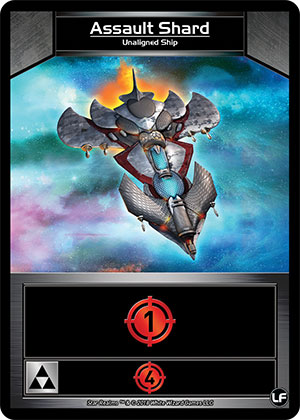
When using the Splinter ability, Assault Shards do 7 damage in total. That is the extent of Jochum’s starting damage. Even so, in the the first two decks of a game, Assault Shards are typically the one you scrap or cycle out in favor of trade, unless you need that damage to destroy a base. As the game progresses, however, if you still have the Assault Shards in your deck, the extra 4 damage from their Splinter ability obviously increases in value.
Command Shard (2x).
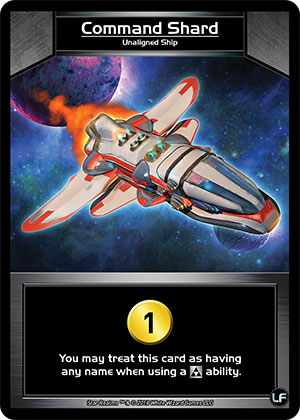
Command Shards are, in-effect, wild cards; they can count as any other Shard when matching 3 Shards to trigger a Splinter ability. For example, if you discard from play a Command Shard with 2 Transport Shards you can use the Transport Shard Splinter ability.
Lost Dreadnaught.
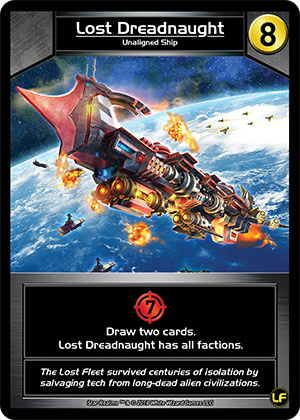
Lost Dreadnaught is not part of Jochum’s starting deck, but one of these is shuffled into the Trade Deck for each person playing as Jochum.
So yeah…buy this card; it’s amazing. I don’t feel like further explanation is necessary.
Gambits: Splinter Tech & Jochum’s Grand Design

Splinter Tech. Each time you use a Splinter ability on a turn, you can choose a faction ability to trigger. This can be used multiple times on a turn to trigger different faction abilities, i.e., for each different Splinter ability you use that turn.
This triggering of faction abilities works similar to how Heroes trigger ally abilities. For example, like Heroes, the Splinter ability will not work on the directly-into-hand cards of Colony Wars (Warning Beacon, Colony Seed Ship, Plasma Vent, or Emperor’s Dreadnaught), nor would it count as having played a Blob card for the purposes of Blob World’s ability.
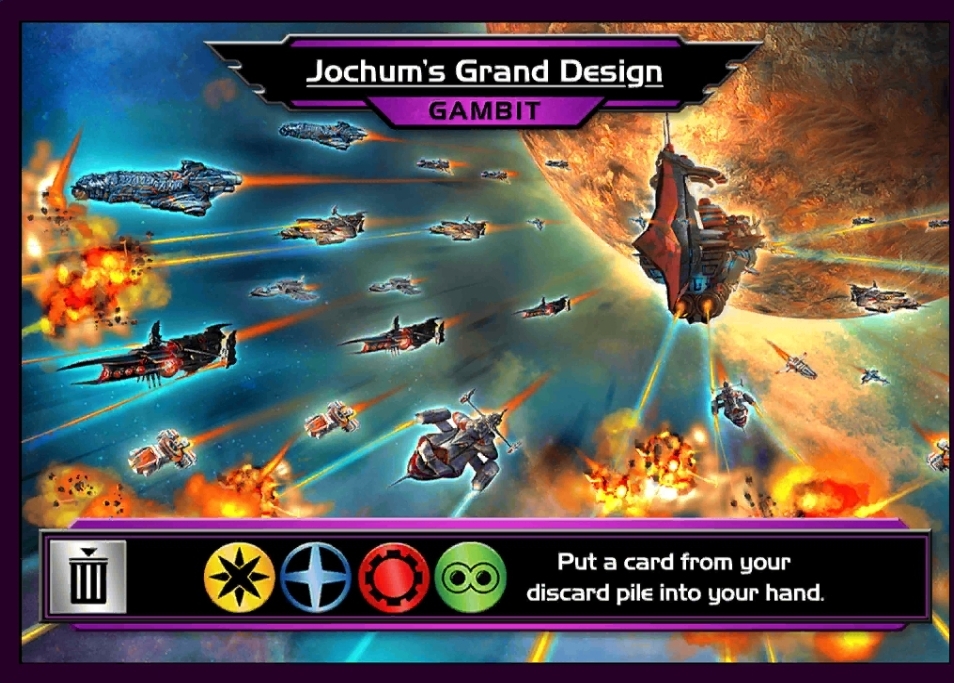
Jochum’s Grand Design. If used effectively early, this Gambit can provide a significant early advantage. Do not hold on to this Gambit indefinitely in the hopes of one day using it on a bomb you just bought. That day may never come. This Gambit is more effectively used to acquire the early bomb in the first place. I have even seen players use this Gambit to pull a measly Shard from their discard pile to bump them up $1 to afford a Leviathan or Ark. Another sometimes effective use of this Gambit is to buy an early high cost base and put it right into play on your first turn or two. With all that said, if you are lucky enough to buy an early Ark without the need of this Gambit, then by all means use this Gambit on the Ark and get that early scrap going.
Side Note: This Gambit also triggers all faction abilities. I include this as a “side note” because very rarely does that factor into the timing of using this Gambit. You will have typically used at least one Splinter ability that turn, which will have already triggered a faction ability (due to the Splinter Tech gambit). If using Jochum’s Grand Design happens to trigger some other faction abilities…bonus! But almost always, in deciding when to use this Gambit, it’s all about when to pull a card from your discard pile, with the faction triggering as an ancillary benefit.
General Strategy
Below I discuss the following topics in the context of playing Jochum effectively:
- Cycling and draws…always and forever
- Trade…you don’t need a lot
- Scrap…you don’t need a lot…jinx
- Damage…right away
- Faction abilities…proper valuation
- Splinter Tech…plan ahead
- Transport Shards on turn 1…to use or not to use
- Shards…scrapping order of operation
- Card Stock Up…Fleet HQ?
1. Cycling and draws are key: Yes, that’s generally true for any Commander, or any deck, but particularly with Jochum. You want to be using those Splinter abilities as often as possible, especially the Transport Shard and, at least early-mid game, the Salvage Shard abilities. But beyond the Splinter abilities themselves, if you trigger a Splinter ability each turn, you’re also triggering at least one extra faction ability that you otherwise couldn’t trigger that turn.
Cycling and draw abilities help shrink your deck, and increase the chances of drawing 3 matching Shards in the same hand.
2. You don’t need much more trade, even early. When playing a full hand of 7 cards, Jochum’s starting trade ranges from $4 to $7 without the need of any gambits. And with Jochum’s Grand Design Gambit, you’re capable of snagging at least one $8 without adding any trade to your deck. In other words, Jochum has decent economy already. That isn’t to say you shouldn’t buy any trade, but rather that you don’t need to load up on trade on your first two turns. You should start buying at least some damage right away.
If you do buy economy, prioritize the following (generally in this order):
- Economy that comes from the faction abilities of damage cards (e.g., Crusher, Battle Screecher, etc.). Because with the Splinter Tech ability, you typically won’t need another card of that faction to trigger the ally ability.
- Economy that draws or cycles (e.g., Farm Ship, Stellar Ray, Imperial Smuggler, etc.)
- Self-scrapping economy (e.g., blob miner, Long Hauler, etc.)
3. One, maybe two, more scrapper is enough. While Jochum has a built-in scrap ability, he’s still at most scrapping one card per deck. Adding an extra scrapper is advisable early. But don’t overbuy scrappers; you don’t need a lot and they will slow your deck down in the short term.
4. Jochum has low starting damage. At most, Jochum can do 7 damage with his starting deck (assuming he triggers the Assault Shard Splinter ability). If he splits his Assault Shards across multiple hands, then he’s doing 1 or 2 damage per hand. In other words, an early vulnerability of Jochum is that he’s not great at killing bases. Out of desperation you can always buy a damage card and then use the Jochum’s Grand Design Gambit to destroy a base, but that’s a less than ideal use of that Gambit, and can only be done once.
In other words, Jochum needs damage right away.
5. Don’t discount faction abilities when that faction isn’t in your deck. When evaluating whether to purchase a card, keep in mind that because of the Splinter Tech ability, you can still benefit from that card’s faction ability.
Take Solar Skiff, for example. It’s great in a heavy blue deck; but if you can’t trigger its faction ability to draw, Solar Skiff can be dead weight. Your likelihood of triggering its ally ability goes into your purchase evaluation. But with Jochum, don’t let a lack of blue cards in your deck trick you into devaluing a card like Solar Skiff. It’s actually a very good early purchase for Jochum even if you don’t have other blue cards; since you’re likely to trigger its faction ability because of Splinter Tech, Solar Skiff provides a good economy boost for only $1.
6. Splinter Tech and planning ahead. When you discard 3 matching Shards from play to use the Splinter ability, you immediately have to choose a faction ability to trigger. This often occurs early in your turn, before you know which faction ability you need. You need to be aware of what’s in your deck and which faction you’re most likely to draw during that turn into when making this decision. This often requires planning out your turn ahead of time, as best you can of course.
7. Transport Shard…maybe not on Player 2’s first turn. While I think Transport Shard’s Splinter ability is the best, your first turn as Player 2 is one circumstance in which you may not want to use it. As Player 2, you will have two turns of 7 cards, and then after your 2nd turn shuffle your deck with everything you purchased. If you use Transport Shard’s Splinter ability to cycle on your first turn, then you are pulling a card from your next hand leaving 6 cards in your deck, which will mean you will shuffle your deck after your first turn, instead of after your second turn. Often it is better to wait and have two turns of purchases before shuffling your deck for the first time. Of course, there are always exceptions, such as if using Transport Shard’s Splinter ability to cycle a Assault Shard out of your hand to give you $7 for The Ark. If you can do something like that on your first turn as Player 2, then ignore what I just said.
8. Card Stock Up: A Few Cards that are Better in a Jochum Deck
Watch for cards whose abilities depend on the number of cards played or discarded (e.g., Fleet HQ, Warpgate Cruiser, etc.). Their value increases in a Jochum deck due to the 7 card hand.
Shard Scrapping: Order of Operations
Ideally, by the end game Jochum is left with little to no Shards. But there is an order by which you should scrap your Shards. It should not be half hazard. The basic principle is that if you remove a set of three Shards from your deck, you’re more likely to trigger the Splinter abilities of the remaining Shards. In other words, try to remove Shards a set at a time.
I generally follow the below scrapping order of operation, listed in order of Shards I try to scrap first (top) down to Shards I save the longest (bottom).
- Scrap what you’ve already scrapped
- While I generally recommend scrapping Assault Shards first, if you’ve already scrapped a Recon Shard and still have all three Assault Shards…then you should scrap all of the the Recon Shards, if possible, before moving on to Assault Shards. Scrap out of the Shards a set at a time.
- Assault Shards
- In the early game, scrap Assault Shards first for the slight economy boost. But by mid, and definitely by late-game, if you still have your Assault Shards, switch to scrapping Recon Shards before Assault Shards.
- Recon Shards
- The only reason to keep these over Assault Shards early is for the economy, but once you’re past deck 2, you might want to shift to scrapping the Recon Shards first.
- Salvage Shards
- Very helpful early to mid game for removing the other Shards. In the early to mid game if I have to choose between using the Salvage or Transport Shard Splinter ability, I typically choose Salvage. But by end game the cycling ability of the Transport Shard is more valuable, which is the only reason I tend to hold on to the Transport Shards last.
- Command Shards
- Command Shards are close to Salvage Shards in this list. You want to keep Command Shards around as wild cards, but when you’re down to 1 Shard set left, that’s the time you can/should start removing the Command Shards.
- Transport Shards
- Cycling is the most valuable end-game Splinter ability, which is why I save Transport Shards to the end.
- Adapt; don’t follow this list blindly
- If you can use Salvage Shard’s ability to scrap early, but the Assault and Recon Shards aren’t available to be scrapped, then by all means just scrap one of the Salvage Shards. Your play style, or the state of a particular game, may warrant a different scrap order. Adapt to the circumstances of the game.
Tools for Defeating Jochum
Discard. Discard hurts any deck, but forcing Jochum to discard Shards decreases the chances of him using the Splinter Tech ability, which in turn can prevents him from triggering a faction ability that turn. Plus, if you can get to the point of making Jochum discard 1 or 2 cards per turn, you’ve effectively nullified his 7 card hand advantage.
Early Bases. As noted, Jochum doesn’t have a lot of damage to start. An early base could stay out for a few turns, or force Jochum to use his Gambit to kill that base.
Trade Row Control. Jochum is well-suited to buying bombs, maybe second only to Nandi. You need to keep those out of the row. Buying up damage cards and then scrapping the rest from the row is an effective strategy.
Aggro. This isn’t necessarily a vulnerability; Jochum can win aggro. But the faster the game, the better your chances against Jochum. Jochum doesn’t lose many long games. Aggro + trade row control may be the best formula.
Match-Ups
If you have a choice, McCready and Walsh appear to be the best matchups against Jochum, with Le possibly receiving honorable mention. Early data suggests that Nandi is the worst matchup, though I’m not convinced players are always using Nandi effectively against Jochum.
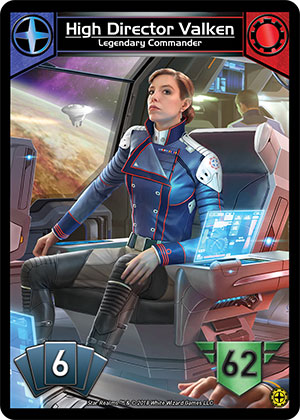
High Director Valken. This is a good matchup for Jochum. Jochum starts with the trade advantage and thus is more likely to grab the early bombs. The problem for Valken in this matchup is that her strategy centers around healing/surviving until she’s built up a strong deck, but Jochum is the strongest long-game Commander. Valken’s best chance against Jochum might be a base wall strategy, since one of Jochum’s early disadvantages is damage.
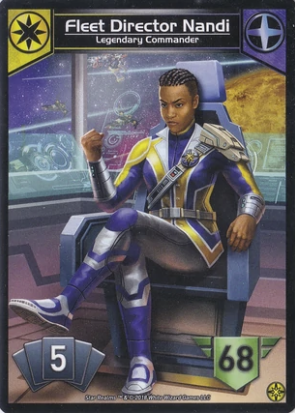
Fleet Director Nandi. Early numbers (in the Commanders events I’ve run) suggest that Jochum dominates Nandi (75% in favor of Jochum as of the writing of this article, through only 29 games). However, I don’t believe this matchup is quite that lopsided. There is a tendency to play Nandi as a control deck, but that won’t usually work against Jochum (5 card hand vs 7 card hand). With Nandi you need to take advantage of her gambit and, unless you need the extra 2 trade for a bomb, use it to constantly throw damage cards and/or bases on top of your deck. As Jochum, making Nandi discard is an effective strategy. Read how they’re playing Nandi; don’t get caught flatfooted if they go aggro.
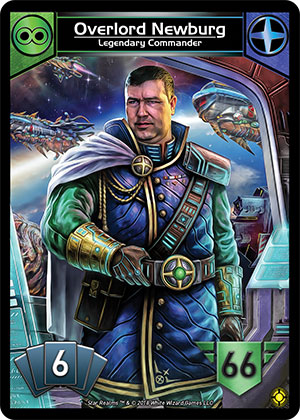
Overlord Newburg. Newburg tends to play quickly, though not as quickly as McCready. Newburg can convert healing into damage, but not enough to make chasing life gain worth it against Jochum. Newburg needs to focus more on Blob than Trade Federation to beat Jochum. Newburg also needs to use his built-in trade row control to remove bombs from the trade row, or even remove the leftover medium cost damage cards that he doesn’t buy on his turn. As Jochum, beware the damage rush and leave the cheap blues (with a few exceptions) in the row as bait for Newburg to nibble on. Bases are helpful in giving Jochum time to build up his deck against Newburg.
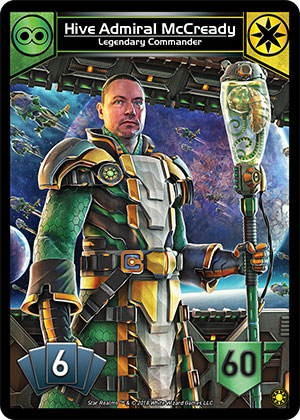
Hive Admiral McCready. McCready, being the most aggro-centric Commander, appears to be one of the more effective Commanders against Jochum. As McCready, push the damage advantage. Fight for those green and yellow cards like they’re the marbles in Hungry Hungry Hippos. Jochum’s advantage over McCready is trade; make sure you’re converting that trade into inflicting and soaking damage. Effective cards against McCready include bases that do damage (especially the yellow ones), and Trade Federation ships that do damage and heal (e.g., Trade Escort, Peacekeeper, Security Craft, etc.).
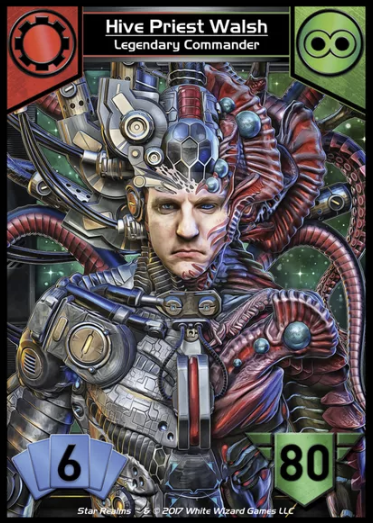
Hive Priest Walsh. Walsh is also an effective Commander against Jochum. Walsh, more than any other Commander, is suited to take advantage of Jochum’s early damage deficiency by throwing a base into play right away. Walsh might even be able to force Jochum to burn his gambit (Jochum’s Grand Design) early in order to destroy one of those early bases. Even though Walsh weakens your bases, as Jochum you can’t just bequeath all of the bases to Walsh. Buy bases, and buy damage so you can deal with Walsh’s bases. While I generally recommend Assault Shards being the first Shard you scrap, against Walsh there will be times when you need that potential extra damage punch…in that case consider scrapping the Recon Shards first.
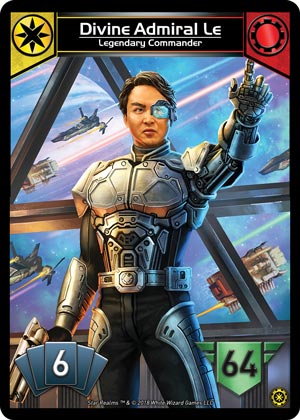
Divine Admiral Le. I only have a small sample size of Le vs Jochum matches so far, but Le shows potential. Le starts off affecting Jochum’s trade advantage (albeit slightly), because he can force a discard right off the bat. The Hungry Hungry Hippos fight in this matchup is over the cheap yellow cards. Le, who also has built-in scrap, has the potential to start forcing 1 or 2 discards a turn fairly quickly, which can help keep Jochum’s deck from getting too far off the ground. As Jochum, you need to start punching right away, but make sure you also have the trade to buy those $7 cost yellow bases when they hit the row.
High Admiral Jochum. Mirror match. If there’s a bomb in the opening trade row, Player 2 is going to get it unless they get unlucky with a bunch of Assault Shards in their first hand. As Player 1, you may still want to hedge your bets and buy at least one card that gives trade on your first turn so that if Player 2 gets unlucky and can’t grab that bomb on their first turn, you can use Jochum’s Grand Design gambit to grab it. Monopolizing trade row control, and securing scrap advantage, are also effective against a fellow Jochum.
Conclusion
- The long game favors Jochum, but Jochum can be vulnerable if you are going full control deck while your opponent goes full aggro; adapt to your opponent’s tempo.
- Against Jochum, be aggressive and push the game to an early finish.
- Know Jochum’s weaknesses, especially when playing as Jochum.
It’s generally advantage Jochum to start; your opponent has the initial burden to tip the scales their way.

Pingback: Command Deck Strategies Part 4: The Union Command and Hive Admiral McCready | Megahaulin Blog for Star Realm Strategy
Pingback: Command Deck Strategies Part 6: The Alignment and Divine Admiral Le | Megahaulin Blog for Star Realm Strategy
Pingback: Command Deck Strategies Part 7: The Coalition and High Director Valken | Megahaulin Blog for Star Realm Strategy